O-rings are a great way to make typing on a mechanical keyboard more comfortable. They cushion each keystroke, reducing the impact of your fingers on the keyboard and making typing more enjoyable. Installing them is surprisingly easy and inexpensive, but it does require some knowledge of the keyboard’s components and a bit of patience. In this article, we’ll provide step-by-step instructions on how to install O-rings on your mechanical keyboard.
Definition of O-rings
O-rings are a type of gasket designed to form a mechanical seal between two surfaces. They are generally made of rubber or a synthetic elastomer, and are circular in shape. O-rings are commonly used in mechanical applications to create a seal between two components, such as a valve or pump, and prevent the escape of fluids or gases. The circular shape of the O-ring ensures that it stays in place when compressed, and seals the components together.
An Overview of Mechanical Keyboards
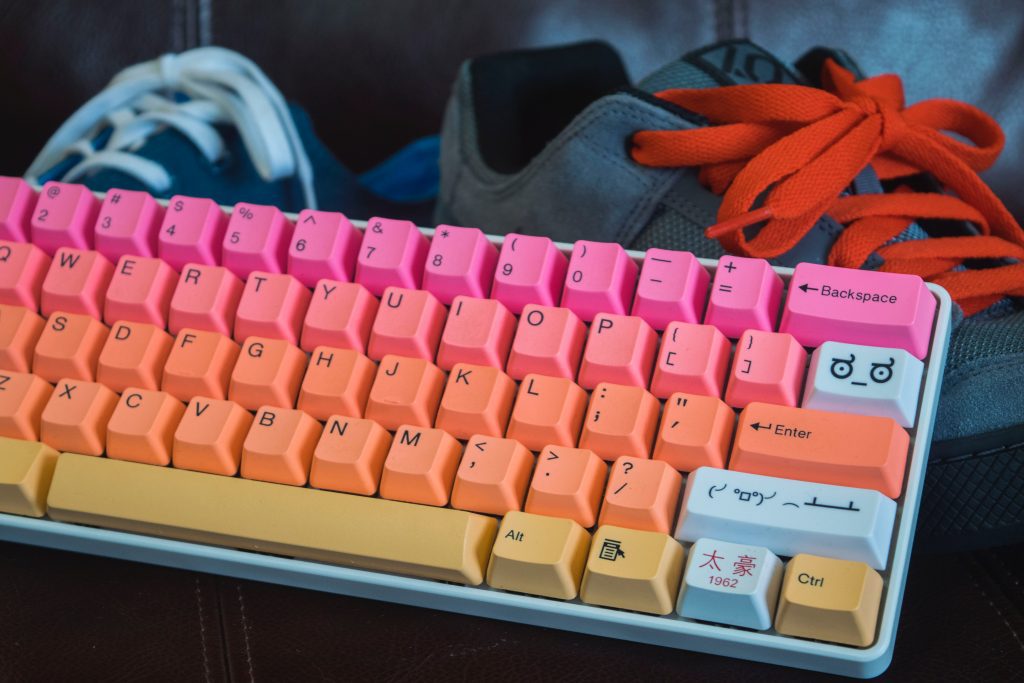
A mechanical keyboard is a type of keyboard that uses individual mechanical switches to register each key press. This makes them more durable and comfortable than traditional keyboards, making them the preferred choice of many gamers and typists. Each key switch is made up of a base, stem, and spring, and provides tactile and audible feedback when pressed. Mechanical keyboards are generally more expensive than traditional keyboards because of their higher quality build and materials.

Mechanical keyboards are available in a variety of sizes, switch types, and styles. Full-sized keyboards typically feature a number pad and standard ALT/CTRL/Windows keys, while TKL (tenkeyless) keyboards omit the number pad. Key switches come in a variety of types, including linear, tactile, and clicky. Linear switches provide a smooth and consistent feel, while tactile switches provide feedback when pressed, and clicky switches provide both tactile and audible feedback.
In addition to different switch types, mechanical keyboards also come in a variety of sizes. They range from full-sized keyboards to compact 60% keyboards, which are designed to be as small as possible while still providing all of the features of a full-sized board.
The main benefit of mechanical keyboards is the comfort and durability they provide. The individual switches are more reliable than traditional rubber dome keyboards, and the tactile and audible feedback give gamers and typists an edge in accuracy and speed. Mechanical keyboards are also customizable, with replaceable key caps and switches, allowing users to customize the look and feel of their keyboard.
What You’ll Need To Install O-rings On Your Mechanical Keyboard?
Installing O-rings on your mechanical keyboard is a great way to reduce the sound of typing and make sure that your keys don’t bottom out. This guide will walk you through the process step-by-step.
O-rings

To install O-rings on your mechanical keyboard, you will need to purchase O-rings that are compatible with your keyboard. You should measure the stem of the keycaps before purchasing and make sure that the O-rings are the right size.
Mechanical keyboard
You will also need access to a mechanical keyboard. This is necessary to ensure that the O-rings fit correctly. If you don’t have a mechanical keyboard, you can purchase one online.
Preparing the Keyboard
Preparing the Keyboard is an important step in the process of installing O-rings on a Mechanical Keyboard. Before beginning the installation process, it is important to first remove the keycaps and clean the keyboard.
Removing the Keycaps
The first step in preparing the keyboard is to remove the keycaps. This can be done using a keycap puller, which is a small tool specifically designed for this purpose. The keycap puller should be used to gently pry the keycaps off the keyboard. It is important to exercise caution when removing the keycaps, as excessive force can damage the keyboard.
Cleaning the Keyboard
Once the keycaps are removed, the keyboard should be cleaned. It is recommended to use a mild cleaning solution and a soft cloth to wipe down the keyboard. This will remove any dust and debris that has accumulated on the keyboard over time. Additionally, make sure to check the stabilizers and switches to ensure they are free of dust and debris. This will ensure that the installation process runs smoothly.
Installing the O-rings
Installing O-rings on your mechanical keyboard is an easy process that can help reduce the noise from keystrokes and also reduce the travel distance of the keys. With a few simple steps, you can have your keyboard feeling like new.
Placing the O-rings on the stems
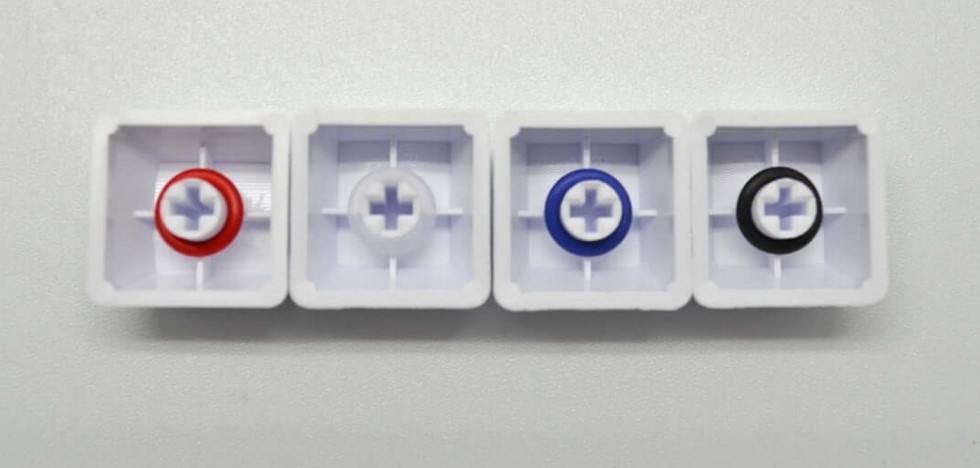
The first step in installing O-rings on your mechanical keyboard is to place the O-rings on the stems of the keycaps. Make sure to place the O-ring on the stem with the thicker side facing up. This will help ensure that the O-ring is firmly seated on the stem and reduce the amount of noise generated when the key is pressed.
Adding the keycaps
Once the O-rings are in place, you can add the keycaps back onto the keyboard. Make sure that the keycaps are firmly seated on the stems, as any loose keycaps can cause the O-rings to slip off. You may want to use a keycap puller to ensure that the keycaps are firmly seated. Once the keycaps are in place, you can enjoy the improved feel of your mechanical keyboard.
Troubleshooting
If you are still having issues with your O-rings, you may need to take a few additional steps to ensure that they are properly installed. Check to make sure that the O-rings are properly cleaned and lubricated, as this can help them to move freely and make contact with the switch. Additionally, if you are using a thick or thin O-ring, you may need to try a different O-ring to see if that resolves the issue. Finally, if none of these steps work, you may need to replace the O-rings.
O-rings not staying in place
If your O-rings are not staying in place, the most likely cause is that they are not installed correctly. Check that all of the O-rings are properly lined up with the stem of the switch and that they are firmly secured. If they are not, you may need to adjust the O-rings or use a small tool to ensure they are installed correctly. Additionally, if you are using a thin O-ring, you may need to use a thicker one to ensure that it stays in place.
O-rings not making the desired sound
If your O-rings are not making the desired sound, the most likely cause is that they are not making adequate contact with the switch. Check that all of the O-rings are properly lined up with the stem of the switch and that they are making contact with it. If they are not, you may need to adjust the O-rings or use a small tool to ensure they are installed correctly. Additionally, if you are using a thick O-ring, you may need to use a thinner one to ensure that it is making contact with the switch.
Also Read: How To Foam Mod A Keyboard?
Conclusion
Overall, installing O-rings on your mechanical keyboard is a great and easy way to reduce noise and make typing more comfortable. Not only do O-rings reduce noise, they also provide a softer feel to your typing which makes it easier on your fingers. With the right tools, it only takes a few minutes and you’ll be enjoying your keyboard in no time. So, if you’re looking for a way to make typing more comfortable and reduce noise, try out O-rings and see if they work for you.
Frequently Asked Questions
What tools do I need to install O-rings on my mechanical keyboard?
You will need a flat-head screwdriver, tweezers, and O-rings of the correct size for your mechanical keyboard.
How do I determine the correct size of O-ring for my mechanical keyboard?
The size of the O-ring is determined by the stem of your mechanical keyboard switch. Refer to your keyboard’s manual to identify the correct size before buying the O-rings.
Where should I install the O-rings on my mechanical keyboard?
The O-rings should be installed on the stem of the switch, directly underneath the keycap.
How do I install the O-rings on my mechanical keyboard?
Use a flat-head screwdriver to remove the keycap, then use tweezers to place the O-ring on the stem and press down to secure it in place.
What are some benefits of installing O-rings on my mechanical keyboard?
Installing O-rings on your mechanical keyboard can reduce keystroke noise and improve the overall feel of your keyboard by providing more cushioning and eliminating bottom-out.


