Starting monerod.exe manually is a great way to take control of your cryptocurrency wallet and ensure secure transactions. This guide outlines the steps required to get started and run the monerod.exe file. Knowing how to start monerod.exe manually can give you peace of mind and confidence in your own cryptocurrency transactions. Following these steps will ensure that your monerod.exe file is running properly and securely for your transactions.
Reason for manually starting monerod.exe

Monerod.exe is a program that allows users to access the Monero network and interact with it. It is an essential piece of software for anyone interested in mining Monero, as it allows users to connect to the Monero network and receive rewards for mining blocks. As such, there are several reasons why one might need to manually start Monerod.exe.
Check Network Connectivity
One of the primary reasons why one might need to start Monerod.exe manually is to check the network connectivity. If the network is slow or unresponsive, it could be due to a misconfigured setting or a problem with the Monero network itself. By starting Monerod.exe manually, users can diagnose the problem and take the necessary steps to resolve it.
Verify Configuration
Another reason why one might need to manually start Monerod.exe is to verify the configuration of the program. It is important to ensure that the proper settings are in place so that Monerod.exe can operate correctly. This can help to avoid any potential issues, such as mining blocks that are not properly rewarded, or not being able to connect to the network.
Resolve Problems
Finally, one might need to manually start Monerod.exe in order to resolve any issues that may arise. If the program is not functioning correctly, or if there are problems with the network, manually starting Monerod.exe can help to identify and fix the issue. This can help to ensure that miners are able to successfully mine Monero blocks and earn rewards.
Steps for Manually Starting monerod.exe

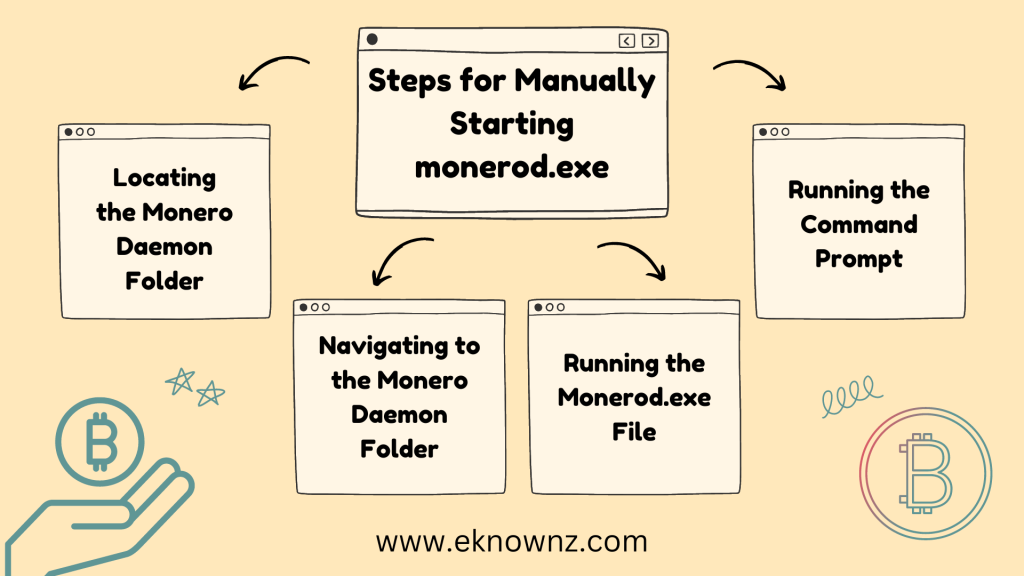
Locating the Monero Daemon Folder
The first step in manually starting monerod.exe is to locate the Monero Daemon folder. This folder is typically located in the ‘Program Files’ directory in Windows, but it could also be located elsewhere. To locate it, open the Windows File Explorer and navigate to the Program Files directory.
Running the Command Prompt
Once the Monero Daemon folder is located, the next step is to run the Command Prompt. This can be done by pressing the Windows key and typing in ‘cmd’. When the Command Prompt application appears, click on it to open it.
Navigating to the Monero Daemon Folder
Once the Command Prompt is open, the next step is to navigate to the Monero Daemon folder. To do this, type in the following command in the Command Prompt window: ‘cd [path to Monero Daemon folder]’. The path will be different for each user depending on where the Monero Daemon folder is located.
Running the Monerod.exe File
The final step is to run the monerod.exe file. To do this, type in ‘monerod.exe’ in the Command Prompt window. This will start the Monero Daemon and it will begin to download and sync the blockchain. Once the blockchain has finished downloading, the Monero Daemon will be ready to use.
Benefits of Manually Starting Monerod.exe

Faster Synchronization
Manually starting Monerod.exe is beneficial for faster synchronization with the Monero network. It helps to download the blockchain data faster and thus, speeds up the synchronization process. The manual start of Monerod.exe also allows users to set a preferred connection speed and to control the download of the blockchain data. This way, users can get the most out of their own connection speed and make sure that their synchronization is as fast as possible.
More Control Over the Monero Network
Manually starting Monerod.exe gives users more control over the Monero network. This is because they can set the maximum connections and configure the amount of data that they want to download. They can also set the parameters of their own node and customize the connection speed. This way, users have more control over their own node and the performance of the entire Monero network.
Improved Security
Manually starting Monerod.exe can also help to improve the security of the Monero network. This is because the manual start of Monerod.exe allows users to set up a secure connection and to configure the amount of data that they want to download. This way, users can make sure that their data is kept secure and that their node is not susceptible to any potential malicious attacks.
Conclusion
Starting monerod.exe manually is a great way to get a better understanding of the Monero blockchain and the cryptocurrency itself. With a few simple steps, you can have Monero running on your computer and be able to check the status of your wallet, as well as keep up with the latest developments. This guide has provided a comprehensive overview of the steps required to manually start monerod.exe. By following these instructions, users can gain greater insight into the world of cryptocurrency and the Monero blockchain.
Also Read: How Polyembryony can be Commercially Exploited
Frequently Asked Questions
What is the Monerod.exe?
Monerod.exe is the daemon for the cryptocurrency Monero, it is responsible for handling the blockchain and network communications.
How do I start Monerod.exe manually?
To start Monerod.exe manually, open the command prompt and navigate to the directory where Monerod.exe is stored. Then, type in “monerod.exe” and press enter.
What are the command line options available when running Monerod.exe?
When running Monerod.exe, the following command line options are available: –data-dir, –add-peer, –testnet, and –stagenet.
What additional steps are needed to start Monerod.exe?
After starting Monerod.exe, additional steps may be needed depending on the purpose. For example, you may need to create a wallet, sync the blockchain, or add/remove peers.
What happens if Monerod.exe fails to start?
If Monerod.exe fails to start, it is usually due to an incorrect command line option or an incorrect directory. Check the command line options and make sure you are in the correct directory and try again.


